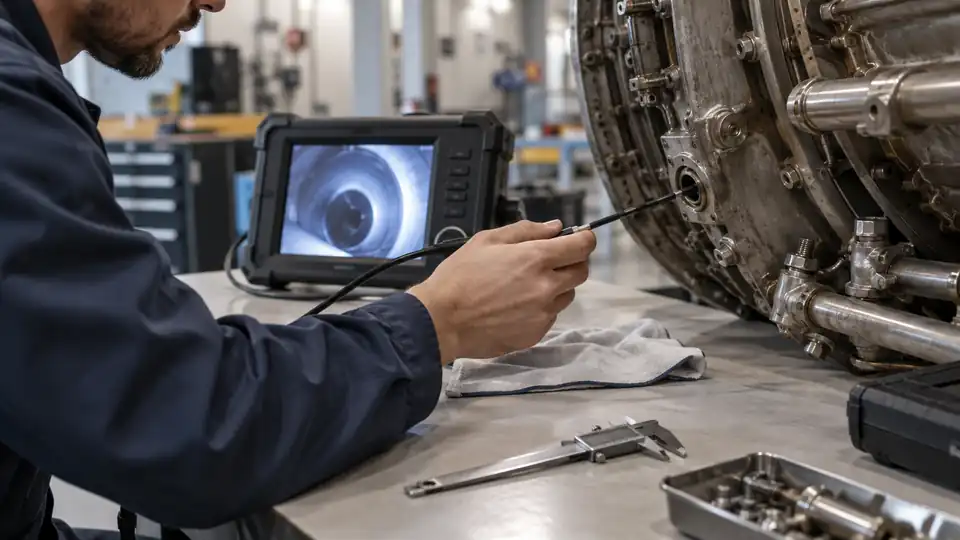
The right borescope probe diameter is determined by the access path first, then by the viewing requirements at the target. A smaller probe can pass through a narrower opening, but diameter alone does not determine inspection quality. Lighting, camera configuration, cable behavior, articulation, working distance, and durability may matter more once the probe fits.
What probe diameter means
Probe diameter usually refers to the outside diameter of the insertion tube or camera head that enters the inspection area. Check the manufacturer’s specification carefully because the widest point may be the camera housing, protective tip, side-view section, or another part of the distal end rather than the flexible tube itself.
The required clearance includes more than the size of a straight hole. A probe may need room to pass around bends, through a grommet, past a fitting, or along a surface without binding. An opening that appears large enough in a straight line may still be unsuitable if the access route changes direction immediately behind it.
Probe diameter affects several practical characteristics:
- Access: A smaller camera head can enter smaller ports and narrow passages.
- Lighting: A larger probe may have more room for illumination components, although LED count alone does not determine useful visibility.
- Camera construction: Diameter can affect the available space for the image sensor, lens, protective window, and viewing configuration.
- Control: Very small probes may be more difficult to guide precisely, especially through long or complicated paths.
- Durability: A larger or more robust insertion tube may tolerate handling demands that would be unsuitable for a delicate small-diameter probe.
- Articulation: Tip-steering mechanisms can require additional space, so the thinnest probe may not provide active articulation.
How to choose a probe diameter
1. Measure the actual access point
Start with the smallest opening the probe must pass through. Measure the opening where possible rather than estimating from a photograph or relying on a general description of the equipment.
Record the following details:
- The opening’s usable inside diameter
- The length of the narrow section
- The direction of the passage after the opening
- Any lips, threads, screens, seals, insulation, or obstructions
- The distance from the opening to the inspection target
Do not treat the opening measurement as permission to use a probe with exactly the same listed diameter. Clearance is needed for insertion, positioning, and withdrawal. A tight fit can make the probe difficult to steer and may damage a seal, the probe jacket, or the inspected component.
2. Account for bends and clearance
A straight access hole is the easiest case. A probe moving through a bend needs additional clearance because the insertion tube does not remain centered as it changes direction. A semi-rigid probe may resist sharp turns, while a flexible probe may pass the bend but become harder to control farther along the path.
For a route with several bends, assess the entire path rather than checking only the entry point. A thin probe may pass the opening but still fail to reach the target because it cannot be pushed or directed through the next turn.
3. Decide whether active articulation is necessary
Diameter and articulation are closely related, but they are separate specifications. A flexible probe bends as it is inserted. A semi-rigid probe can hold a manually formed curve. An articulating probe uses a control mechanism to redirect the distal tip.
Active tip control can be useful when the camera must turn toward a specific surface after entering a cavity. If the target is directly ahead, a small fixed-view probe may be sufficient. If the target is around a corner, a slightly larger articulating probe may produce a more useful inspection than a thinner probe that cannot be aimed reliably.
Two-way and four-way articulation describe the directions in which the tip can be steered. They do not by themselves define a mathematical 360-degree movement. Rotational control, rotating insertion tubes, side-view cameras, and claimed full directional coverage describe different features and should be checked in the product specification.
4. Match the diameter to the target and working distance
A probe that fits the opening may still be poorly suited to the target. The camera needs an appropriate distance from the surface to produce a useful image. If the lens is pressed against the target, detail may be difficult to interpret. If the camera is too far away, small features may be lost.
Working distance depends on the camera and lens design, so use the manufacturer’s stated information where available. If it is not provided, test the camera on a similar surface before relying on it for a critical inspection.
Reflective metal, wet surfaces, oil, soot, and glossy coatings can produce glare or low contrast. A larger probe with a different lighting arrangement or viewing direction may be more useful than the smallest available model.
Probe diameter categories and typical uses
Exact dimensions vary by manufacturer, but probe choices can be understood in broad groups. The categories below describe practical tradeoffs rather than fixed size standards.
| Probe category | Access characteristics | Common advantages | Possible limitations |
|---|---|---|---|
| Small-diameter probe | Suitable for narrow ports and restricted spaces | Improved access through small openings and around some tight passages | May have less lighting capacity, less mechanical protection, limited articulation, or reduced push control |
| Mid-size probe | Fits many service openings and general inspection ports | Balanced access, handling, lighting, and camera capability | May be too large for narrow passages and too flexible or short for specialized routes |
| Larger probe | Requires a more generous access path | May provide a more robust tube, stronger handling, larger camera housing, or active articulation | Needs more clearance and may be difficult to guide through small bends |
These categories should guide the selection process, not replace the listed specifications for a particular inspection camera.
Small probe versus larger probe
When a smaller probe is useful
- Access is limited by a small inspection port, spark-plug opening, service hole, or narrow cavity.
- The route contains tight spaces where a larger camera head cannot pass.
- The inspection target is close to the entry point and does not require substantial pushing force.
- The task requires viewing a localized area rather than covering a large space.
Small probes can be especially useful for reaching restricted areas, but they may be harder to position once inside. A thin flexible cable can bend away from the target, and a small lens may provide a narrow or less stable view depending on the camera design.
When a larger probe may be more effective
- The access point has sufficient clearance and the route is relatively open.
- The inspection requires a longer push through a passage where cable control matters.
- The target is around a bend and active articulation would help aim the camera.
- The environment places greater demands on the probe jacket, tip, or connector.
- A larger camera configuration provides the lighting or viewing direction the task requires.
A larger probe can provide better handling and control, but it should never be selected without confirming that it can pass the full access route.
Probe diameter by inspection task
| Inspection task | Diameter priorities | Additional factors to check |
|---|---|---|
| Engine or cylinder inspection | Must pass through the available access opening and reach the target without binding | Close-focus behavior, lighting on metallic surfaces, articulation, tip protection, and equipment temperature |
| Pipe or drain inspection | Must fit the pipe and negotiate bends | Pushability, cable stiffness, recovery, water exposure, debris, and the difference between a consumer borescope and a purpose-built sewer camera |
| Wall cavity inspection | Should fit the access hole while leaving room to aim the camera | Insulation, wiring, pipes, framing, probe control, and the limited field of view inside the cavity |
| HVAC or duct inspection | Must pass through the access port and travel through the duct layout | Dust, bends, cable reach, lighting, camera orientation, and the fact that a visual image does not measure airflow or system efficiency |
| Machinery or equipment inspection | Must clear the entry point and any internal passages | Machine condition, moving parts, sharp edges, temperature, chemical exposure, and the need to isolate hazardous equipment |
Probe diameter is only one part of the specification
Cable behavior
A long probe may reach a distant target, but extra length can make precise positioning more difficult. Flexible cables are useful for routes with curves, while semi-rigid cables can hold a shaped path and may be easier to guide through a short access route. Neither cable type automatically provides active tip steering.
Choose enough reach to access the target without creating unnecessary cable to manage. Check how the cable behaves when pushed, bent, and withdrawn. A cable that is too stiff may resist bends. One that is too flexible may buckle or wander instead of advancing toward the target.
Viewing direction and camera configuration
A forward-view camera looks along the insertion path. A side-view camera is oriented toward the side of the probe. A dual-lens camera may provide more than one viewing direction, depending on its design. A mirror accessory changes the apparent viewing direction but does not function as a second camera.
These options solve different access problems. A side-view or dual-lens design may be useful for examining a wall, pipe surface, or nearby component without repeatedly rotating the probe. Articulation may be preferable when the camera must be aimed actively toward several locations.
Lighting
Probe diameter can affect the physical space available for illumination, but more LEDs do not guarantee a clearer image. Too little light can hide surface detail. Excessive light can create glare and washed-out areas, especially on polished metal, wet surfaces, or oily components.
Adjust the light level when the camera provides that control. Keep the lens clean, and move the probe to a more useful distance before relying on digital zoom. Digital zoom enlarges captured pixels. It does not recover detail that the camera did not record.
Image and display specifications
Camera resolution, live-view resolution, display resolution, and recording resolution may be different. A higher advertised camera resolution does not guarantee a more useful inspection if the lens is out of focus, the probe is moving, the lighting is poor, or the target is too far away.
Probe stability and positioning often have a greater effect on the ability to recognize a surface feature than a small difference in listed resolution. Diameter selection should therefore support the physical access and control needed to obtain a steady, properly lit view.
How to verify fit before inserting the probe
- Identify the narrowest point. Measure the entry opening and any visible restriction farther along the path.
- Check the complete probe dimensions. Compare the opening with the widest part of the insertion assembly, including the camera head and protective tip.
- Map the route. Look for bends, sharp edges, threads, seals, screens, debris, and areas where the probe could snag.
- Confirm the reach. Make sure the cable can reach the target while leaving enough control outside the access point.
- Choose the needed control. Decide whether a fixed, flexible, semi-rigid, rotating, side-view, dual-lens, or articulating design suits the target.
- Test the camera before insertion. Confirm the display, lighting, focus behavior, recording function, and connector or app compatibility.
- Insert gradually. Maintain a light grip and watch the live image. Stop if the probe meets unexpected resistance.
Never force a probe through an obstruction or sharp bend. Pushing harder can damage the camera head, cable, articulation mechanism, connector, seals, or the equipment being inspected. Withdraw slightly, reassess the route, and use a different access point or a more suitable probe if necessary.
Safety and operating limits
Probe diameter does not determine whether an environment is safe for inspection. Isolate moving machinery before inserting a camera unless the equipment and inspection method are specifically approved for operation. Treat energized electrical systems, pressurized equipment, hot components, contaminated spaces, and chemical exposure as separate hazards.
Check the operating limits for the specific probe and camera. A water-resistant camera head does not make the monitor, handle, connector, or phone suitable for immersion. Water resistance also does not establish heat resistance, oil resistance, or chemical compatibility. An IP rating may apply to one component rather than the complete system.
For a hot engine, chimney, duct, pipe, or industrial system, do not assume that a small probe can tolerate the conditions. Wait for a safe condition or use equipment specifically rated for the environment.
What a suitable diameter can and cannot establish
A properly sized probe improves access and may produce a better view of visible surfaces. It does not prove the cause or severity of a defect. A camera may show deposits, discoloration, debris, corrosion-like changes, scoring-like marks, standing water, damaged insulation, or a crack-like feature. These observations may require additional testing, measurement, cleaning, or professional evaluation.
The best diameter is the one that provides sufficient clearance while preserving the control, lighting, viewing direction, reach, and environmental suitability required for the inspection. Selecting the smallest available probe can solve an access problem, but it may create a control or image problem once the camera is inside.
